Hello fellow yarn lovers! Get ready to fall in love with the sweetest little accessory your wardrobe has been missing. Introducing our charming Country Cottage Headband Crochet Pattern! Imagine a headband that feels like a gentle hug from a bygone era, with a delicate texture reminiscent of wildflowers and sun-drenched fields. This beauty is perfect for adding a touch of rustic charm to your everyday style, and it’s an absolute dream for gifting!
Whether you’re just starting your crochet journey or you’re a seasoned pro looking for a quick and delightful project, this pattern is made for you! It’s simple enough for beginners to master quickly, and the result is a truly lovely piece that feels so special. You’ll learn a few easy stitches that come together to create a wonderfully textured headband. So grab your hook and some cozy yarn, and let’s bring this little bit of country cottage magic to life!
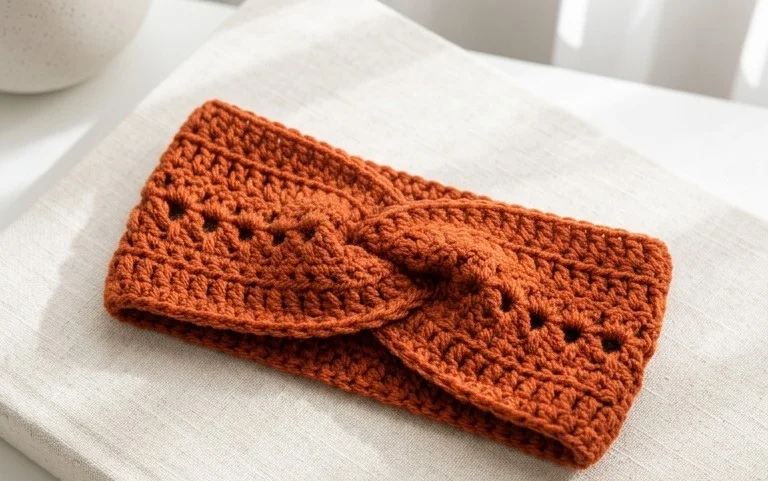
Cozy Comfort for Your Crown: The Country Cottage Headband Crochet Pattern
There’s something undeniably charming about a country cottage. Think rolling hills, blooming wildflowers, and a sense of gentle, handmade warmth. Our Country Cottage Headband Crochet Pattern aims to capture that very essence, wrapping your head in a hug of soft yarn and intricate, yet achievable, stitches. Whether you’re looking for a touch of rustic elegance for a special occasion, a cozy accessory for a chilly day, or simply a delightful weekend project, this headband is sure to become a favorite. Let’s dive into the world of delightful stitches and yarn, and create something truly special!
Choosing Your Perfect Yarn and Hook
The foundation of any successful crochet project lies in selecting the right materials. For the Country Cottage Headband, we want yarn that offers a beautiful drape, a touch of warmth, and a pleasing texture.
Yarn Recommendations:
Worsted Weight Cotton or Cotton Blend: This is our go-to for the Country Cottage Headband. Cotton provides excellent stitch definition, making those lovely textured stitches pop. It’s also breathable and comfortable against the skin, perfect for year-round wear. Look for yarns with a lovely matte finish for that authentic cottage feel. Brands like Lily Sugar ‘n Cream, Lion Brand Comfy Cotton Blend, or Patons Canadiana are excellent choices.
DK Weight Yarn: If you prefer a slightly lighter and more delicate headband, DK weight yarn is a fantastic option. This will result in a less bulky and more airy headband, perfect for warmer weather or for layering.
Worsted Weight Acrylic: For a budget-friendly and super durable option, acrylic yarn is always a good choice. Look for softer acrylics that don’t feel scratchy. This is also a great choice if you want to experiment with vibrant colors.
Hook Size: The recommended hook size will depend on your chosen yarn weight and your personal crocheting tension.
For worsted weight yarn, a 5.0mm (H-8) or 5.5mm (I-9) crochet hook is usually ideal.
For DK weight yarn, you’ll likely want to go down a hook size, perhaps a 4.0mm (G-6) or 4.5mm (7).
Pro Tip: Always check the yarn label for the recommended hook size. It’s a great starting point, but don’t be afraid to adjust slightly to achieve your desired fabric. If your stitches look too loose and gappy, go down a hook size. If they feel too tight and stiff, go up a hook size.
Mastering the Stitches: Your Crochet Toolkit
This pattern is designed to be accessible, even for those newer to crochet. We’ll be utilizing a few fundamental stitches that, when combined, create beautiful texture and structure.
The Foundation: Chain (ch): This is how we begin our work, creating a flexible starting edge.
The Backbone: Single Crochet (sc): A basic but essential stitch that creates a dense and sturdy fabric.
Adding Height and Texture: Half Double Crochet (hdc): This stitch is taller than a single crochet and creates a lovely, slightly textured row.
The Star of the Show: The Textured Cluster Stitch: This is where the “country cottage” magic happens! This stitch creates a delightful bobble or puff effect, adding depth and visual interest. The exact technique for this stitch will be clearly detailed in the pattern, but it generally involves working several stitches into the same space, then closing them all together to create a raised texture. Don’t be intimidated – it’s easier than it looks!
Finishing Touches: Slip Stitch (sl st): Used to join rounds or fasten off your work neatly.
Tips for Beginners:
Practice Makes Perfect: Before you start your headband, take some time to practice the individual stitches. Make small swatches of single crochet, half double crochet, and the textured cluster stitch. This will help you get a feel for the tension and the stitch mechanics.
Read Through the Pattern First: Before picking up your hook, read the entire pattern from beginning to end. This will give you a good overview of the process and any stitches that might be new to you.
Don’t Be Afraid to Unravel: We all make mistakes! If you notice an error a few rows back, it’s better to unravel and fix it than to continue with a mistake that might be harder to correct later.
Use a Stitch Marker: Stitch markers are invaluable for keeping track of your stitch count, especially in rows or rounds where it’s easy to lose your place. Mark the beginning of your rows or important stitch markers.
Consistent Tension: Try to maintain consistent tension throughout your work. This will result in a more even and professional-looking finished product.
Personalize Your Pretty: Customization Ideas
The beauty of crochet is its endless potential for personalization! Our Country Cottage Headband is a perfect canvas for your creativity.
Color Play:
Monochromatic Magic: Stick to a single color for a classic and sophisticated look.
Striped Serenity: Alternate colors every few rows for a charming striped effect. Think soft pastels or earthy tones.
Two-Tone Charm: Use one color for the main body of the headband and a contrasting color for a border or accent details.
Gradient Goodness: If you have a variegated yarn with beautiful color changes, let it shine!
Size It Up (or Down!): The headband is worked in a rectangle that is then joined. This makes it incredibly easy to adjust the size.
Measure Your Head: The easiest way to ensure a perfect fit is to measure around your head where you want the headband to sit. Then, crochet your rectangular piece until it’s the desired length, allowing for the stretch of the join.
Child Sizes: Simply make the rectangle shorter.
Adult Sizes: You can make it longer, or if you have a larger head circumference, you might need to add a few extra stitches to the initial chain for width as well, ensuring the textured stitch pattern remains consistent.
Adding Embellishments:
Crocheted Flowers: A small, delicate crocheted flower or a cluster of them can add a whimsical touch.
Buttons: A pretty vintage button or a simple wooden button can be sewn onto the seam for a decorative accent.
Ribbon: Weave a thin ribbon through some of the stitches for a subtle pop of color and texture.
Beads: Small seed beads can be crocheted into the textured stitches for a bit of sparkle.
Loving Your Creation: Care Instructions
Once your beautiful Country Cottage Headband is complete, you’ll want to keep it looking its best for years to come.
Washing:
Hand Wash is Best: For most yarn types, especially cotton, hand washing in cool or lukewarm water with a mild detergent is the safest option. Gently swish the headband in the water, avoiding harsh scrubbing.
Machine Wash (with Caution): If your yarn is 100% acrylic or a robust blend, you might be able to machine wash it on a gentle cycle with cool water. Always place your crocheted item in a mesh laundry bag to prevent snagging.
Drying:
Reshape and Lay Flat: Never put your crocheted headband in a dryer! The heat can damage the fibers and cause it to lose its shape. After washing, gently squeeze out excess water (do not wring). Reshape the headband to its original dimensions and lay it flat on a clean towel or a drying rack.
Air Dry: Allow the headband to air dry completely away from direct sunlight or heat.
Beyond the Headband: Project Ideas
The techniques learned in creating the Country Cottage Headband can be applied to so many other wonderful projects!
Cottage Cozy Scarf: Extend the rectangular piece to create a beautiful, textured scarf.
Granny Square Bloomers: Use the textured cluster stitch as a decorative element within larger granny squares for a charming baby outfit.
Textured Market Bag: Increase the width and length to create a durable and stylish market bag.
Cozy Mug Cozy: Make a smaller version for a delightful gift or for your own favorite mug.
Textured Potholders: Use a cotton yarn and a slightly tighter tension for heat-resistant potholders.
The Country Cottage Headband is more than just an accessory; it’s a little piece of handmade joy. So grab your yarn, your hook, and let the cozy crafting begin! You’ll find yourself reaching for this charming creation time and time again.
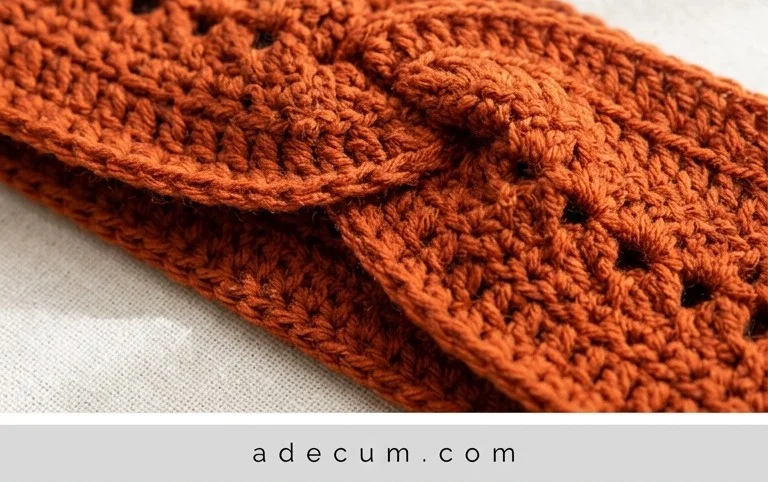
We hope you’ve enjoyed exploring the Country Cottage Headband crochet pattern! This charming and cozy design is perfect for adding a touch of handmade warmth to any outfit. We can’t wait to see your creations, so please share your finished headbands on social media using #CountryCottageHeadband and tag us! Feel free to experiment with different yarn colors, add a decorative button, or even stitch a few delicate flowers for a unique touch. And if you loved crocheting this piece, be sure to browse our collection of other delightful patterns for your next crafting adventure!